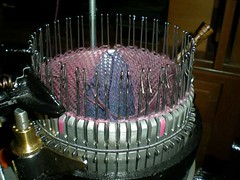
 Circular sock machines are for more than just socks! I've made tube scarves, mittens, and even bath mitts on mine. Roxanna on sockknittingmachines and other lists makes a ton of interesting things -- soap dispenser covers, door-draft-snakes, stuffed animals -- and more! The old Victorian knitting manual available to members of sockknittingmachinefriends has a ton of clothes, of all things, in it -- sock machine knit pieces, sewn together.
I plan also to knit a sock-scarf (one end is a sock! though you're not meant to wear it, LOL), gloves, and fingerless gloves/arm warmers on my sock machine.
 My latest non-sock is a pedicure sock. These are also great simply as flip-flop socks!
Here's the pattern:
I used Pat Fly's hand dyed superwash merino sock yarn, though any sock yarn would do; and my 80-needle cylinder in my NZAK with my 40-needle ribber. At the top I carried along my lycra thread for extra elasticity. After knitting on waste yarn and getting it set up in 1/1 rib, I tied on my sock yarn and lycra to start knitting 1/1 rib.
- knit 1 row 1/1 rib (in sock yarn + lycra)
- put the ribber out of work and knit 1 row (this is to make the selvedge edge, so the top won't unravel)
- put the ribber back in work, knit 15 rows 1/1 rib
- break the lycra yarn and continue with just the sock yarn in 1/1 rib for 10 more rows.
- switch out every other ribber needle for a cylinder needle so you are now knitting 3/1 rib, and knit 3/1 rib for 20 rows (more for a longer sock)
- switch out the front (heel-side) ribber needles for cylinder needles and knit 10 rows (this is a "false heel" above the actual short-row heel)
- stop in front and switch out the remaining ribber stitches, remove the ribber, and lift the back 40 (half) needles out of work in preparation for the heel.
- put the yarn in the tension arm and knit a short-row heel (my favorite method is the 10-minute heel, feel free to use yours, or knit a increase-only heel, a scotch flap heel ... the sky's the limit!)
- keeping the yarn in the tension arm, knit 35 rows.
- re-introduce the ribber, putting every other cylinder stitch onto a ribber needle and removing the cylinder needle it came from. The first row of 1/1 rib is hard to knit, so take it easy and hand-latch those that need it. If you want to reintroduce the lycra thread, wait until the second or third row of ribbing.
- knit 10-25 rows of 1/1 rib (the socks shown have 10 rows). Leave a tail that is about 2 feet long, and then knit on 20 rows of waste yarn (in rib if you like, so you are ready for the next sock!)
Now, you aren't done -- granted, there are no toes to close (yay!) but you have live stitches on the foot ribbing. I took a leaf from the professional machine stitchers (thanks April!) and ran my 2 feet length of yarn through all the live stitches on the last row of the sock yarn on the foot. Keep it loosely enough threaded to stretch, and weave in the end. Then I ran some elastic shirring thread through as well to increase its hold.
 A really cool thing about these is that they don't need sizing -- pretty much one-size-fits-most. And isn't pink a great pedicure sock color, LOL!
Wa-la, pedicure socks! These are destined for a Christmas prezzie :-)
****
See a list of all my sock machine posts.
Here are some great sock machine blogs: SoxophonePlayer, The Sock Lady, and Yarn in the Family.
Thanks to the Circular Sock Machine group on Ravelry for the pointers!
Handknit? Knitty has a great pedicure sock pattern!
